Thursday, June 30, 2016

Black and White Scraphappiness! A chair and ottoman makeover

Okay, ready for chair #2 makeover?
 I love chairs like this because they are fairly easy to reupholster...
and they don't take a lot of fabric...
But first, let me show you this cool little mid-century ottoman
I just finished, because it was my inspiration 
for the chair as well.
 Straight out of the 50's I would guess!
 I used this black and white print to cover the top, 
which I stapled along the edges
and trimmed..
 And then I stapled a wide strip all along the sides.......
 I'm going to use this faux nailhead trim that comes in strips to hide all the staples
and secure the sides to the top.
 It would be oh so tedious to put in every one of these nail heads....
 For the strip, you nail in every 5th or 6th one...much faster and easier.
Affter adding that, I stapled the bottom edge and added black rope trim.
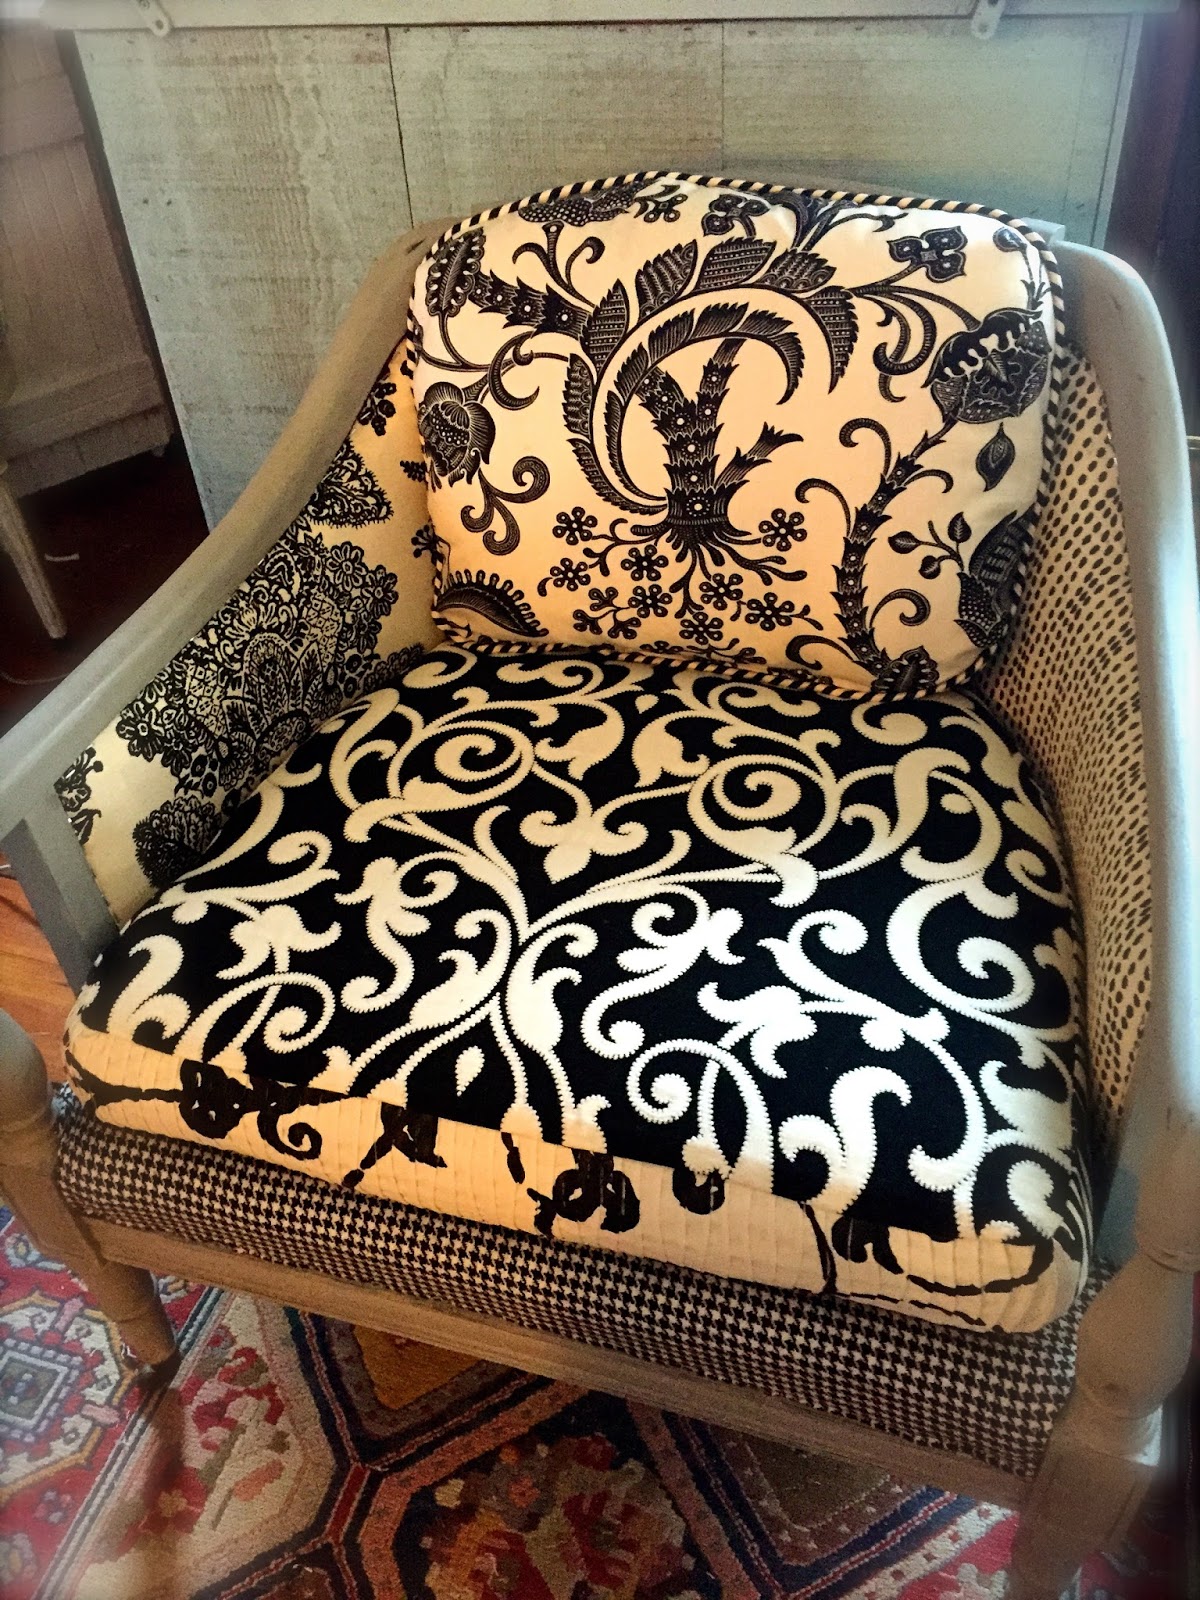
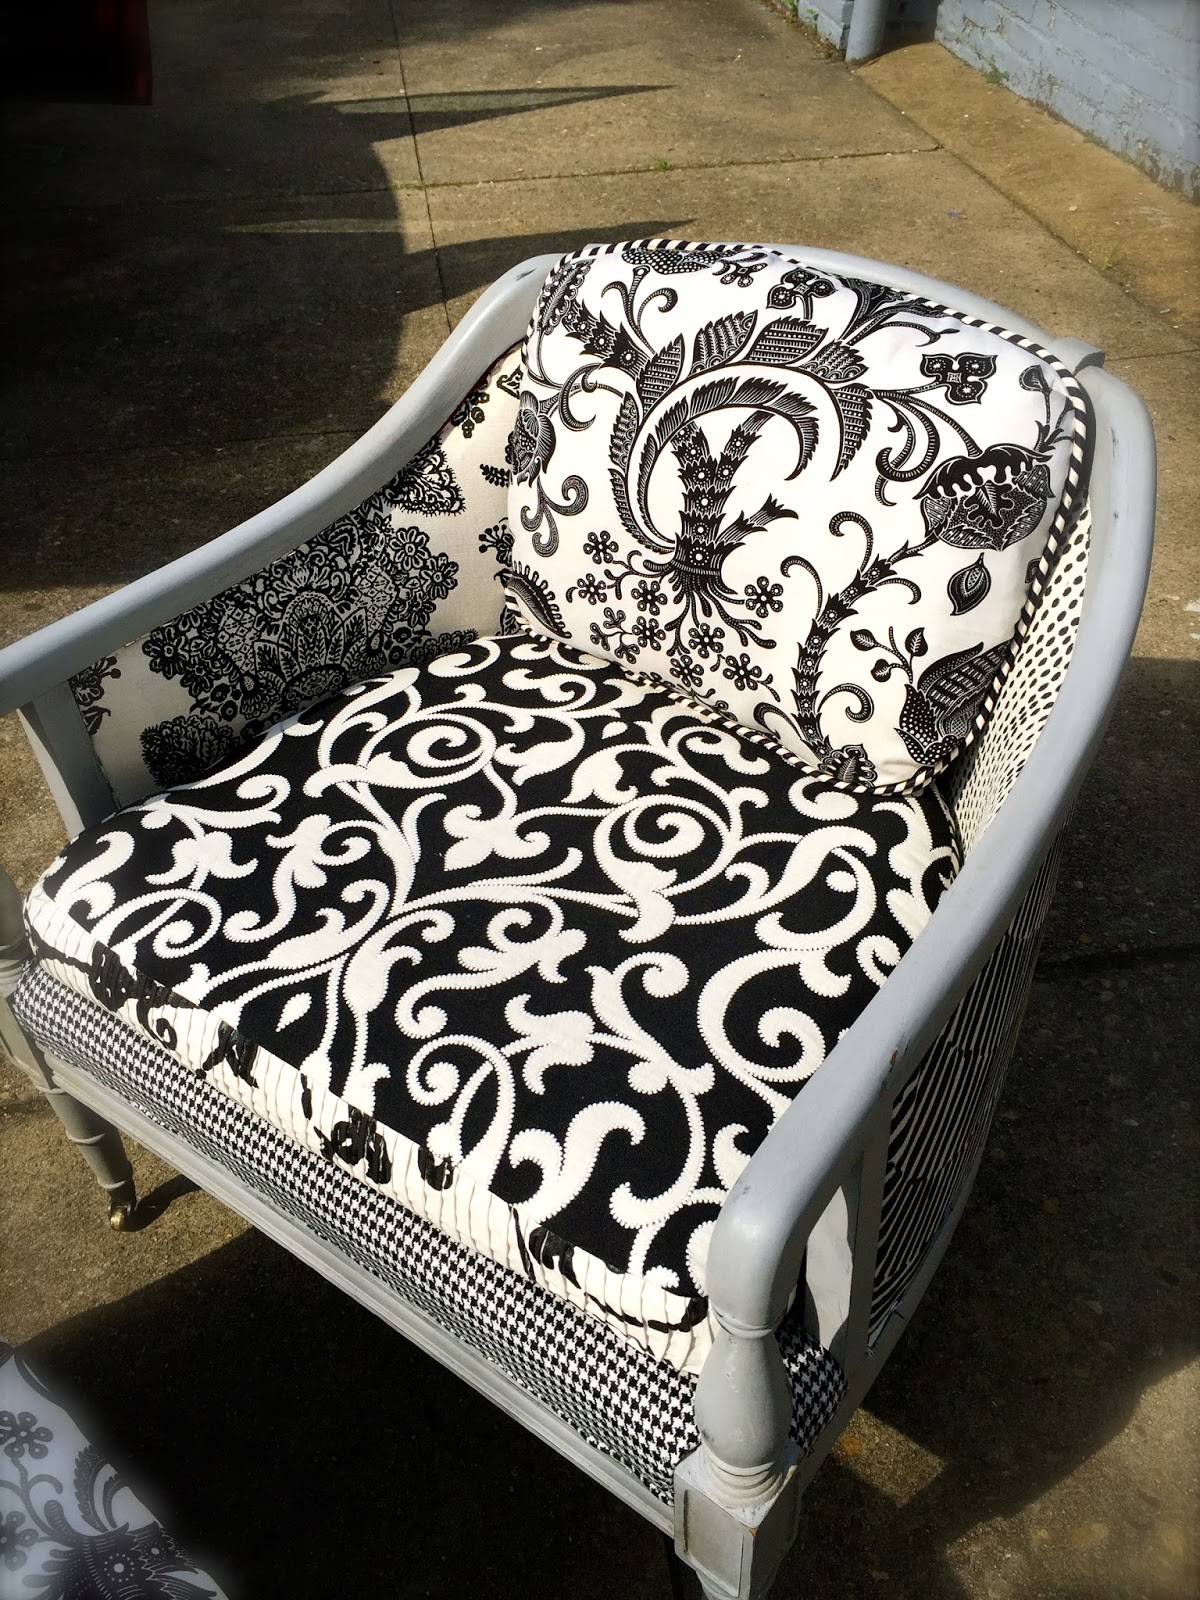
 It turned out so nice, I decided to go with black and white 
as well for the chair makeover...
 Thanks to a good friend who's a fabric rep, 
I had lots of high end fabric samples that I've been hoarding for years.
 This was the perfect opportunity to use them because the samples were large enough
for the various parts of this chair.
 It turned out great!!!
 I especially love the pleated fabric I used for the front...
 Here you see the back of the chair...
 Each panel is different, 
yet the B&W ties it all together...
 After the chair was done, I recovered the cushion.
 On the flip side, of course, is yet another fabric!

 And finally, the back cushion......
Fabric one...

 Fabric two...
 Yep, another "many faced" chair.
 All that's left to do is the trim.

 Packing up to head to my Greenwood Antiques booth.......
The chair is $349.
The ottoman is sold.


Scraphappiness.
by 
SheShe, The Home Magician
Sheila Fox
sheilafox@aol.com
804-402-4370

Wednesday, June 29, 2016

Stars and Stripes Forever! And one look for this remade chair!

Another great pair of vintage chairs 
I found at Class & Trash!
(I LOVE that place!!)
Dated red velour and boring wood finish.
I've already finished chair one.
Here's what I did:
I stripped the trim and staples...
 
I painted all the wood in Annie Sloan Chalk Paint
in Paris Grey.
Afterwards, I distress sanded, waxed and buffed.
Ready for new clothes.
Seat first...
Next, I used a blue and beige ticking for the inside arms and front.
You know me, I can't resist "mixing it up."
This indigo remnant I used for the back.
Next, I trimmed and covered all the staples/edges with beige gimp.
I used nail heads for all the corners to secure the gimp.
So the base is all done...
Next, I recovered the seat cushion.  
Here it is with a throw pillow on the back...
Then I whipped up a cover for the back cushion.
 
Once again,
different fabric was used for the back side of the cushion.
And the seat cushion...
So you can have four different looks,
including this stars & stripes...
perfect for July 4th!
My quality control agent gives her stamp of approval.
And here it is in my booth at RVA Antiques on the Avenue.
 For sale at $299.
It's a great size, lightweight, and has front casters!
So it's easy to move around.
Happy 4th of July, everyone!!!

The next chair is being worked on now......
You'll just have to wait to see what I'm doing with #2!

SheShe, The Home Magician
Sheila Fox
sheilafox@aol.com
804-402-4370

Monday, June 27, 2016

Yes, you CAN fix ugly!!!!!!!! Some SheShe Before & Afters

Dressers,
desks,
vanities,
cabinets,
coffee tables,
nightstands,
chairs,
beds,
china hutches..............
Yes, you CAN fix ugly!
Browse through some of these SheShe before/afters
I've done over the years...

Have an ugly piece?
I can fix it!
SheShe, The Home Magician
Sheila Fox
804-402-4370