Thursday, January 29, 2015

A whirlwind week of moving and shaking! Inventory for sale

Wow, it's been a whirlwind week!
I cleared out my space at RVA Antiques.
and then moved all the inventory 
My main space at Greenwood.
(Fuzzy wuzzy chair is back!!!!! $165.
Upholstered stool: $48.
Bird nightstand: $135)
I had way too much stuff for my booth, though,
 so I rented yet another booth at Greenwood. 
It's on the beautiful 2nd floor which was just opened 
this past year. 
(Barkcloth slipper chair/stool: $165)
(Vintage scale $85)
Please do check it out 
if you're in the Western Albemarle region!

Of course, 
I couldn't get out of RVA Antiques without purchasing!!!!
I'm telling you, the prices are so great there!!!! 
I'll definitely be a return shopper.

Here are a couple of pieces I bought to redo/resell:
 Fun little star bench...
 I decided to funk it up with different colors…..
 Then I distressed and dry brushed stain to age it...
 Makes a great display piece in my booth...
 For sale. $99.
 Next, I bought this little faux apothecary cabinet
 It's really just a chest, with a top that opens.
I distressed it, added some layers of paint and stain..
 It now lives in my upstairs booth at Greenwood. $99.
(Zebra settee: $399. Compass table: $99.)
Oh, and I found more tote bags 
to make doggie pillows!
  Love these!
Small ones are $32 each.
Large are $45. 
In aqua or red, 
while supplies last!

Thanks for looking!!
(Please inquire about any of the other items 
you might be interested in.)

Spring will be here before you know it!
I hope…...


Thursday, January 22, 2015

Making Pillows from a Canvas Tote Bag.

 Saw this cute little tote bag at Marshalls this week….
The last thing I need is another tote bag...
 But I couldn't resist…
I love images printed on canvas…
it got my wheels turning…...
 Pillows!!!
 I used some fabric remnants for the backs. 
(Thanks, Julie Herring!)
 After stuffing with polyfill, I stitched up the seam.
Here's the first finished pillow...
 And here is the pair...
 For the second one, 
I cut out the word "DOGGIE" 
raveled the edges,
and sewed it onto the front.
 The backs……...
The fronts.
Doggone it, they're cute!!!
Great gifts!!
$28 and $32.
$52 for the pair.


Wednesday, January 21, 2015

How to fix a chair with a broken cane seat…without recaning!

Take a look at this oak chair I purchased last week..
for a song….
 ..because of this broken cane seat...
 (Someone had done a lovely upholstery job as well…
with blue vinyl….NOT!)
 Shall we begin the transformation??
First I traced and cut a template for the seat.
 Then I traced the outline onto a scrap piece of MDF, 
and I jigsawed along the line.
Then I cut scrap foam to fit the MDF base,
and used spray adhesive to mount it on the MDF.
Then I added a layer of batting and stapled to the bottom.
Moving to the seat front/back,
I removed all the nail heads and the vinyl trim.
I added a layer of batting, and a scrap piece of ticking, 
folding along the perimeter and
stapling.
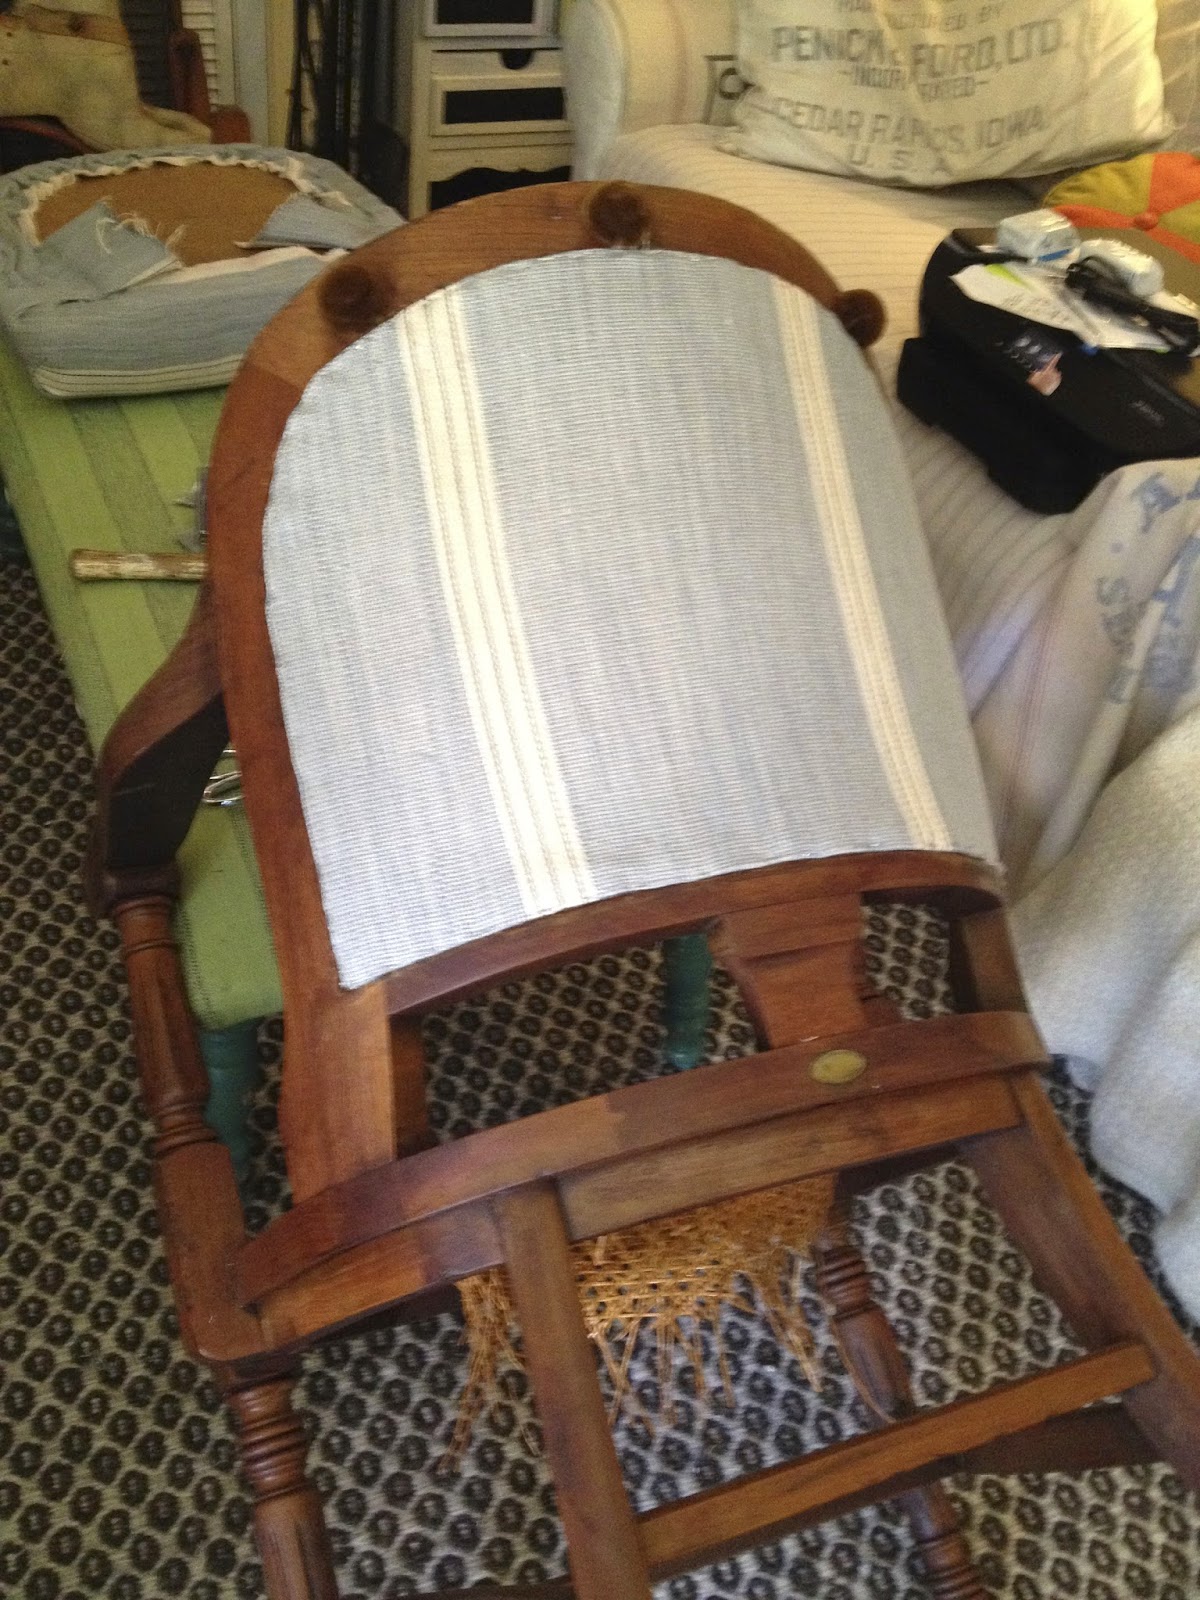
 On the back, I did the same, 
but I used different fabric…
(See that little tiny brass plague 
on the back edge of the seat?
That is engraved with
"C and O Railroad."
How cool is that!)
 And I used that same fabric to cover the seat cushion.
 I glued natural gimp to the edges of the front and back 
to cover all the staples.
I added burlap cording to the bottom edge of the seat cushion.
Then I secured the seat cushion to the chair by covering the caning
with another piece of MDF from below, 
and screwing that into the bottom of the seat cushion.
 Here's the finished back...
 …and the front.

No one's the wiser that this was once a misfit chair!
Now it's a comfy refurbished railroad relic!
Using all scrap materials.
And that, my friends, is today's SheShe makeover!


Sunday, January 18, 2015

Using discarded picket fencing to make Christmas Angels

Angels….
from recycled picket fencing….
I made a bunch last Christmas to sell…
Garden Angels that had names of flowers...
And my friend, Lisa, just posted this on Facebook. 
(She bought this one last Christmas for
her stepmother.
"Edelweiss" now lives in Charleston, SC!)

So this Christmas, 
I decided to come up with the next generation…
Christmas Angels…
I had a busy busy December, 
so I only made a couple.
But they were fun…
got my creative juices flowing.
(And made a huge mess in my kitchen!)

This year, I made them more of a mixed media creation
by adding scraps of fabric and jewelry and buttons.
So let me show you how they've morphed!
 First I painted the picket.
 I used craft paints and Sharpie paint markers to sketch on the face.
And for the body, I'm just making it one long Christmas tree.
 The horizontal pieces get angel wings...
 These are painted on canvas and glued, but usually, 
I just paint right on the wood.
 After painting,
 I start with the fun stuff!
Ornamentation...
 Fabric scraps for a scarf and headwear..
Buttons and beads and pieces of old necklaces
for the tree trimming.
Something's missing tho.
 Her hair!!!!!
Much better...
Meet "Kim."
 And this is "Tara."
 I glued red welting around the bases 
that I took off some old valances…
Beads, burlap, 
And a tag from canvas...
 A piece of brush fringe, 
a tassle and button make a funky headpiece.
They look rather "flapper-esque."

I wonder what next year's will be?