Wednesday, December 3, 2014

Tacky Lights Tour: Lamp Makeovers

Tis the season, isn't it?
For tacky light tours?
How bout a tacky lamp tour?
Cuz I sure have seen a lot of them lately!
You might not think about it….
but yes, you CAN makeover a lamp!!
I do it all the time!!!

Walk with me if you will….
to the land of ugly lamps………
and see what can be done with these
ugly ducklings!
 First up, a pair of glitzy gold urn lamps ,
I really like the nice silk shades and decorative finials...
but the gold finish on the lamp base is so flat.
It looks cheap - like spray paint!
Where's my chalk paint!!!!!!
Here it is. 
Old White. 
Perfect.
I dry brush on the Old White.
(I don't want my brush to be too wet,
so when I brush along the surfaces,
it doesn't get into all the nooks and crannies.)
 Here they are after the paint has dried.
 Now the artistry begins;)
The left one has been waxed with clear,
and then dark wax in some of the details.
The right is still just painted.
See the difference?
 Here they are both waxed and finished.
Using a stiff brush,
the wax will eat away some of the paint, 
and reveal hints of the gold.
They're beautiful now!
For sale in my booth.
$185 for the pair
 Next, this urn lamp.
I brought this into my Mom's house,
and she said,
"Oh, what an ugly lamp."
Just wait…..
 Dry brushed with Old White.
 Next, with a small art brush, 
I painted just the flat part of the surface in French Linen,
not the details, which I left white.
 Then I added a hit of Paris Grey here and there,
and clear and dark waxed.
This lamp rocks now!!
I paired it with this burlap shade that was 
the perfect size & shape.
For Sale: $75
And finally, ooh….
I'm sure you've seen this type before.
Right out of the 60's/70's...
 Amber glass with wood and bronze.
(Can't you just see them sitting atop a
70's Mediterranean style
piece of dark furniture?
With chunky knocker pulls?
Blech…)
 First up, two coats of Old White. 
On everything,
even the glass.
 Next, I added Paris Grey to all the grooves and to the decorative edges.
Don't worry too much about this stage...
 Because afterwards,
dry brushing with Old White
will
soften everything...
The painting is finished...
 Next waxing.
 Clear, and then I used lots of dark in areas to simulate age.
Here you can see the difference..
Left: Painted and Waxed
Right: Painted only
Wow, such frenchy loveliness!
For sale, $150 for the pair.

All are at my booth at Greenwood Antiques
(let me know if I can pick any up for you on my next trip.)
And that, my friends,
ends the tacky lamp tour for the evening!!


Monday, December 1, 2014

A "Scraphappy" New Look for a Pair of Tufted Wing Chairs


Somehow I got involved with this pair of wing chairs…
They were for sale in another dealer's booth
at Greenwood Antiques & Uniques.
Lovely lines, 
but old lady fabric….
Someone inquired whether I could redo them to go with this one 
that was recently purchased from my booth.

Here's the back of that chair.
(I used a pair of Pottery Barn linen drapes for the fabric on the back.…)

Let me just say,
 if I were looking for the ideal chair to reupholster,
it would NOT be this one.
I'd categorize it as…challenging.
(Wilma, however, seems very fond of it.
After all, she is Queen of the Universe!)

After removing the piping and staples,
I painted the frame, then waxed.
Next,
deconstruction.
I removed the back piece, 
to use as a template for the back fabric.
Next, I removed this batting,
and then the cardboard.
And this is what's next.
I cut all the threads to remove the batting
globs, and the buttons.
Next, deciding on fabric…….
I didn't have any of the ticking fabric from the original chair., 
so I tried this on the front.
Which I hated.
(I'll reserve it for the back.)
A trip to Williams & Sherrill for some fabric….
and let the tufting begin!
Looking quite nice!
I thread each button with heavy duty string.
And with a long needle, 
feed it through from front to back,
where I reuse the batting globs. 
Then I pull tight and tie off each string.
And then to the next button.
And the next.
After the tufting is done, 
I stapled the cardboard and some fresh batting to the back.
Next I pull the fabric to the back and staple all along the edges. 
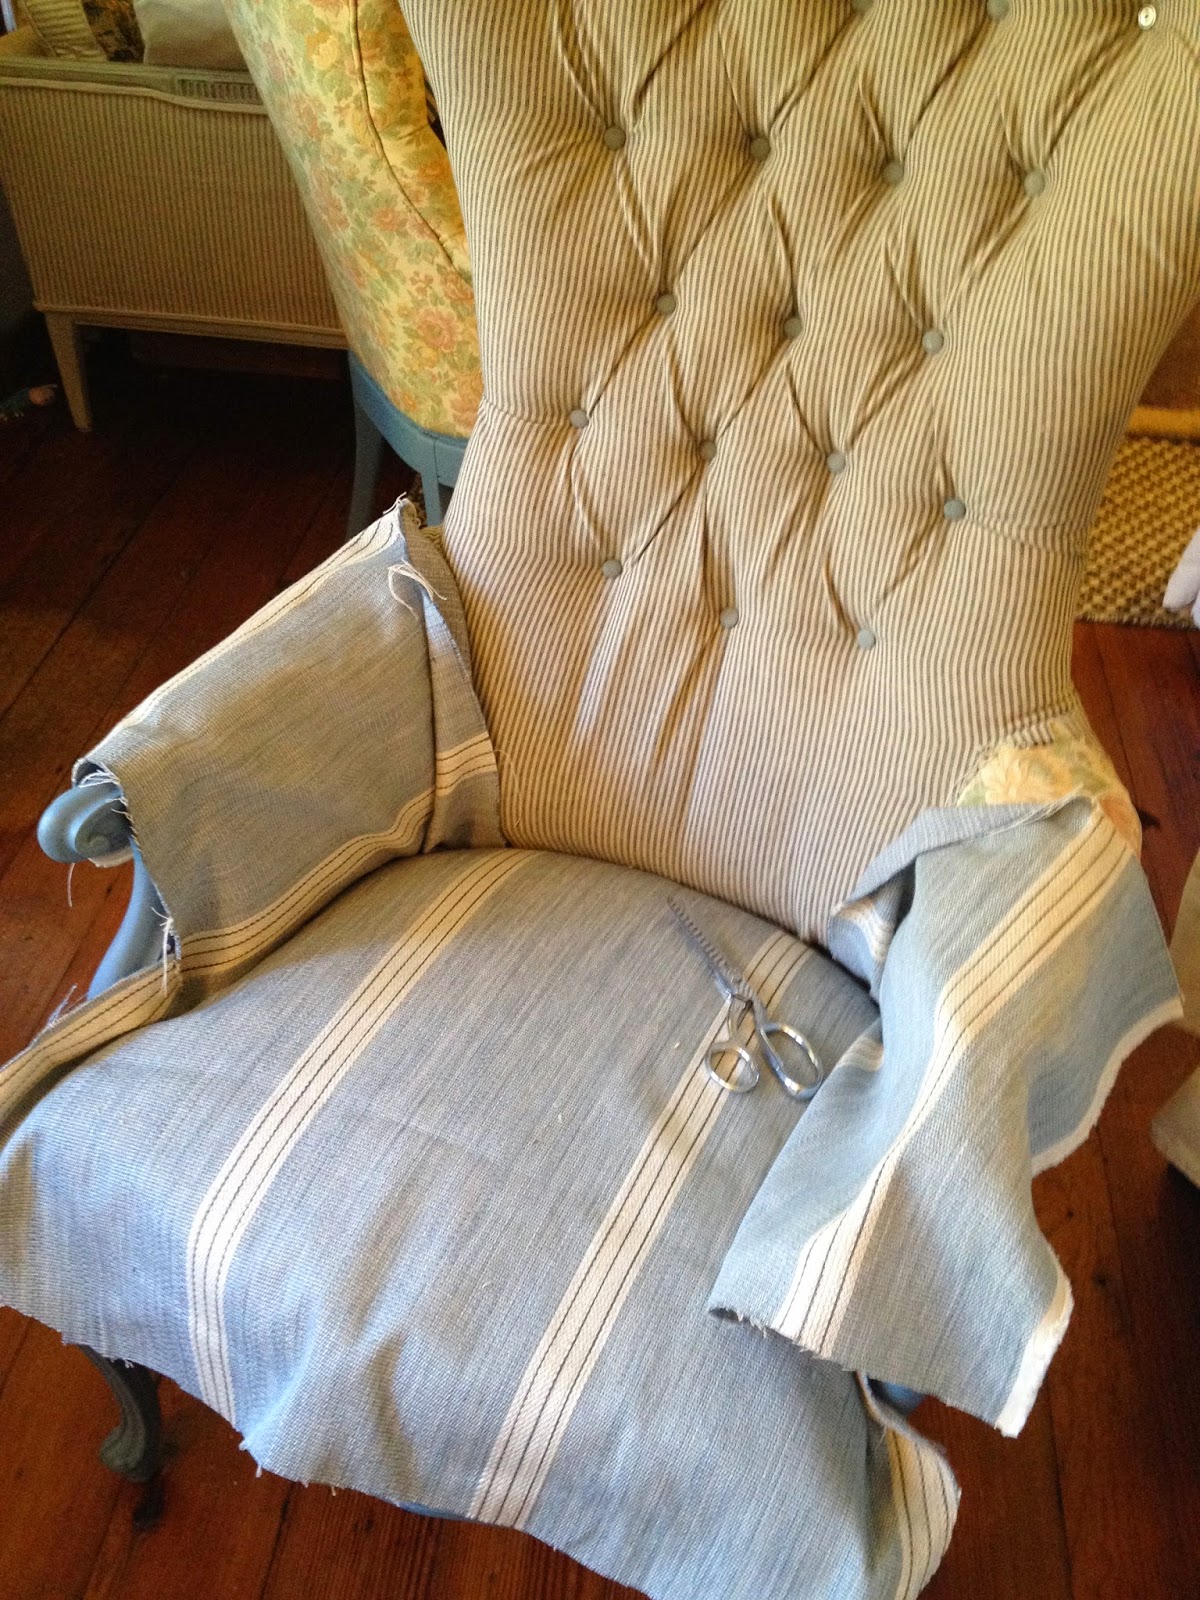
And on to the seat and arms.
I'm doing one of my "scrap happy" approaches…
A different fabric: 
A delicious thick ticking for the seat and arms,
that will hold up nicely.
(I won't go into all the details, 
but all this is damn hard!)
Getting there…
Then I take the back fabric I've already cut out using the 
old fabric as a template,
and staple all along the edges.
I'm able to do the back and outer sides all with one cut of fabric.
And finally, the gimp, 
which I glue along all the edges to hide the staples.
I use oversized nail heads where the gimp meets.
Nice little finishing detail.

One down, one to go.
Here is the finished pair!!!!
Front..
Sideview...
Rearview.
And with a recent change of plans,
I'm pleased to announce these just may be coming up for sale soon!!!
Let me know if you might be interested.
$900 for this gorgeous pair of
scraphappy SheShe chairs!!!!!
What a perfect Christmas gift for the little Missus!


Tuesday, November 25, 2014

Happy Thanksgiving and Shop Local this Weekend!

Wishing you all a Happy Thanksgiving.
After the feasting, 
don't forget to support your local businesses this Saturday!

If you haven't made it to  RVA Antiques yet, 
you need to go!
6102 Lakeside Ave.
Lots of unique, one-of-a-kind Christmas gifts.

Several other destinations in the area
(Consignment Connections,
Twig,
Whispers of Time)
definitely make it worth the trip!

Check out some of the pieces 
you can find in my booth at RVA:

Come on in to SheShe's!
Set of three owl plaques.
Little insect and mouse ornaments….
Unique furnishings.
Revamped letter holder.
Cute little end table with slide out drawer.

 Fuzzy wuzzy chair!
 Fun peacock chair!
 Bird art with hooks
Another coat rack: "This little piggy.."
Bulletin board made with old oak frame.
 
Vintage Santa rag wreath
Dishware
Moroccan ottoman and art

Doggy leash station
Reinvented clock casing with equestrian needlepoint.

And SO much more…

Have a great holiday, folks!!!!
Gobble gobble!