Tuesday, February 9, 2016

A project using antique fruit packing labels

My friend, Lisa, just shipped me a box 
of these wonderful antique fruit labels.
 I couldn't wait to use them for a project!!!
I took a wooden shelf,
cut, painted and nailed bead board to the back,
then pasted the labels on the back…
One of the labels was so fragile, I damaged it gluing...
But that's okay - I like it that way!
 Next I added some clear and dark waxes to age the interior,
 and protect the labels.
 And on the bottom of the piece,
I screwed in mason jar lids.
 And added these jars - in a great aqua.
(Although these look vintage,
they are actually new from Target!)
 This is gonna look SO awesome 
hung on someone's kitchen wall!!!!
I love how the aqua glass sparkles.
Lots of storage, 
and you can use the jars to store whatever:
Tea bags, coffee, sugar, candies…..
the possibilities are limitless!!!!!!
And you can get all that stuff off the countertop!

This piece is for sale. $85.
(And thank you, Lisa!)


SheShe, The Home Magician
Sheila Fox
sheilafox@aol.com
804-402-4370

Monday, February 8, 2016

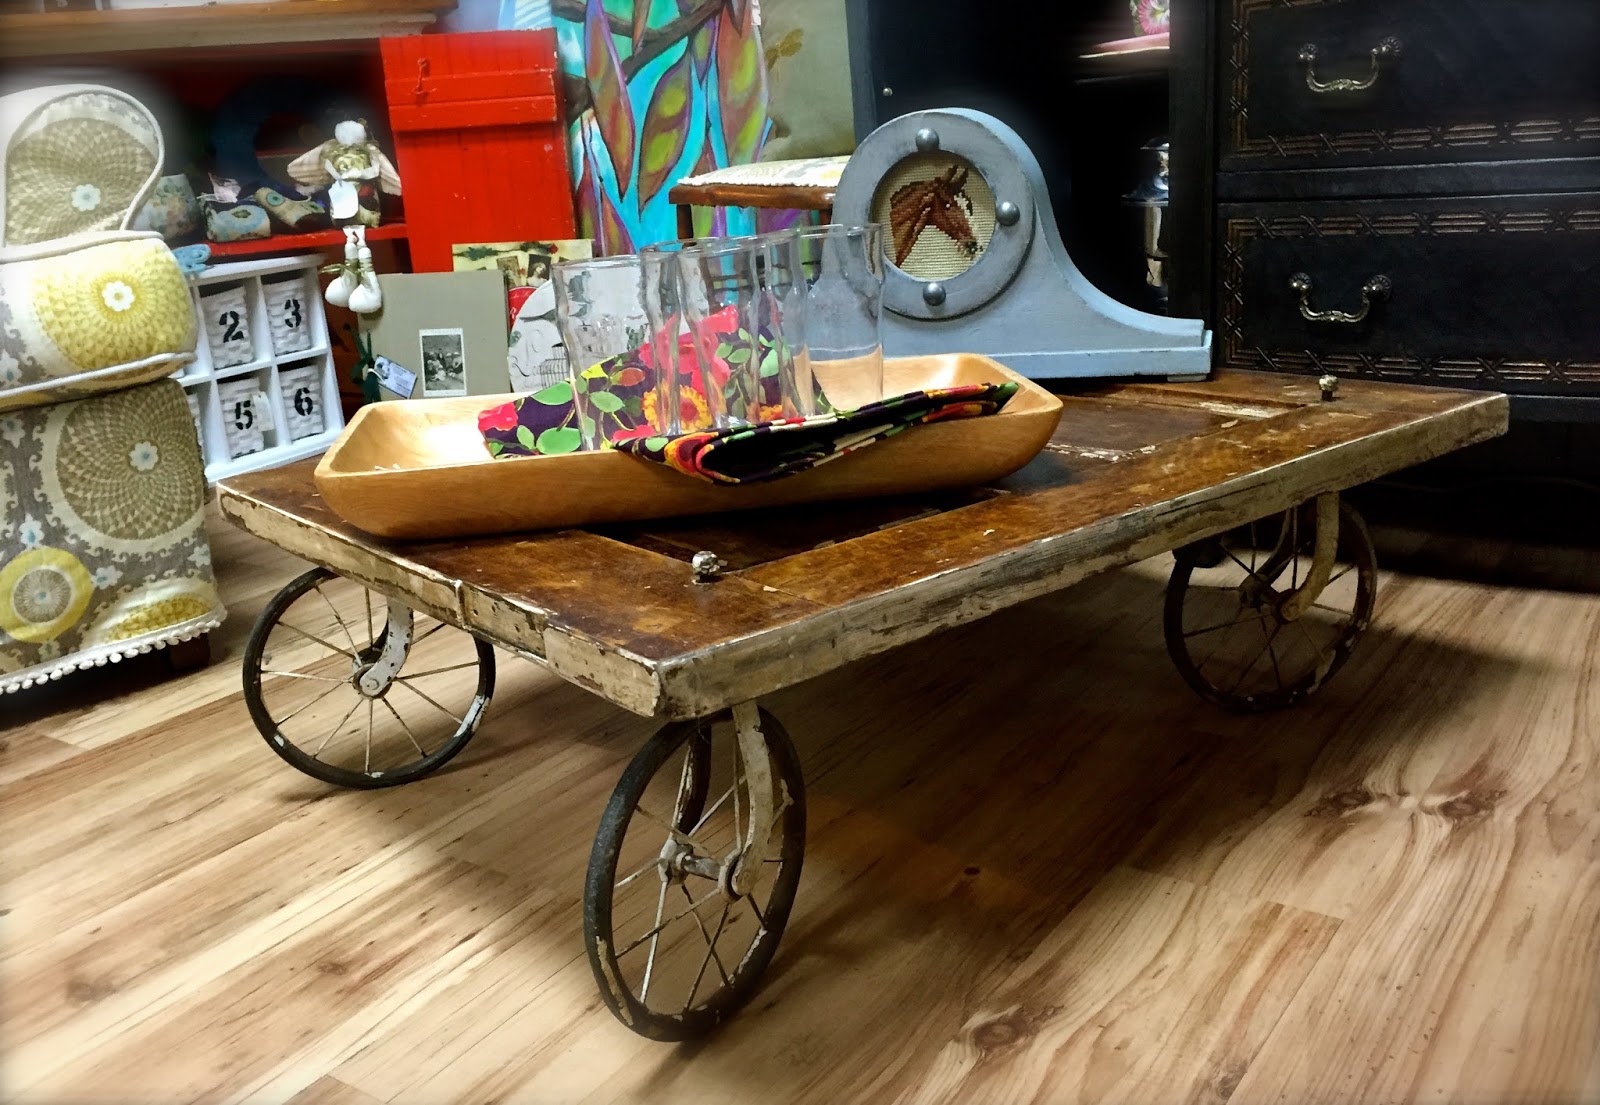
Industrial Coffee Table from a Door & Old Wheels


 During that snow storm at my mom's,
I was able to remove these incredible wheels...
 …from this very old baby playpen 
that had been down in her basement for a few years…
(Can you actually imagine putting a baby in this thing???!!)
 Yesterday, I decided to tackle the project 
I had in mind for those wheels.
It started by stripping this old piece of door I found in an alley.
After brushing stripper on the painted top,
I covered it in plastic wrap and let it sit for about 30 minutes.
 Then I started stripping………
one of my least favorite things to do.
Which is why I usually PAINT!
 But I wanted a wood top for this coffee table.
After I got most of the paint off, I sanded, and then
brushed on a stain.
I let it sit for a few minutes...
 Then I wiped off.
I drilled four holes into the wood, 
added the wheels, and voila.
Some of the paint still remains, but that's okay
because it goes with the chippy wheels.
 I think it's the bomb.
Here it is all staged in my booth 
For Sale: $175
I also decided to work on this fellow…
Mr. Froggy I picked up at a thrift store.
It's one of those made-to-look-like-concrete pieces...
I mixed up some Annie Sloan Chalk Paint 
in Versailles and Antibes Green.

And painted him up.
Then while I was outside staining today,
I added some stain to him, 
particularly in all the nooks and crannies.
And here he is in my booth  
For sale $38.
He would make an awesome bird bath base,
or add a pot of flowers or cascading vines on top of his crown!

And while I've gotcha, 
I might as well show you a few more things 
in my booth, which I just reset this evening:
 Oversized framed botanical. $85
Buffet: $265
Lamp: $95
Vintage rattan chair and ottoman,
with new upholstery.
$335
Buddhaboy: $45
Print: $26

SheShe, The Home Magician
Sheila Fox
sheilafox@aol.com
804-402-4370

Tuesday, February 2, 2016

Get out the Brasso!!!!! Polishing Brass Door Hardware


What a beautiful day it is! 
Wow, makes you want to get outdoors again.
So I did!
And while I was out there, 
I noticed the tarnished letter slot on my front door.
So I got out the Brasso,
and got to work.
When I was finished,
it looked like this!
Brand new!
This stuff is amazing.
So then I decided to do the hardware on the front door.
Here's what it looked like.
You may think the 
brass plating has eroded 
and that it won't clean up.
But you'll be surprised...
 Now it doesn't just wipe right off, that's for sure!
You will have to repeatedly add the Brasso,
let it sit, and then use a soft cloth to rub and rub.
Slowly but surely,
it comes off!
 Your rag will start to look like this.
 Look at that difference..
 Here it is halfway done...
 And all finished.
Revisit: BEFORE
 And AFTER.

My rotator cuff is gonna be screaming tonight
after all that polishing.
But my front door sure looks nice!

Hmmm, what else can I do……..
Can you tell I'm B O R E D??

SheShe, The Home Magician
Sheila Fox
sheilafox@aol.com
804-402-4370


Monday, February 1, 2016

A Dated Ottoman Gets a Homespun Makeover


 This is about the ugliest ottoman I've ever seen.
Dated chenille fabric...
The piece sags in the middle...
And these fabric covered legs are the worst!
I started this makeover by removing the fabric from the legs
and body..
I cut a piece of scrap lumber 
and used angle brackets to secure it to the inside top,
to take care of that sag.
Next, I sanded and stained the wood legs.
They aren't great looking,
but anything is better than that fabric.
 Next, I upholstered with a polar fleece throw
to stabilize all the batting and make it tight.
And it's ready for the final fabric.
 I'm using this ticking fabric….
 I just pulled tight and stapled along the inside edges.
The corners were a little tricky…
I pleated the fabric for those,
and then stapled and cut off the excess.
Then I glued strips of fabric to hide the edging,
and secured with over sized nail heads.
 Detail.
 It's still not my favorite piece,
 But it's a heck of a lot better!
And the rustic legs work nicely with this simple fabric.
Overhead.
Time to put up the tootsies!!

SheShe, The Home Magician
Sheila Fox
sheilafox@aol.com
804-402-4370