Saturday, April 27, 2013

More Upholstered Chairs from SheShe

My client, Beth, had a couple of chairs that looked like this...
 Beautiful wood detail, but dated upholstery.......
Torn gimp...
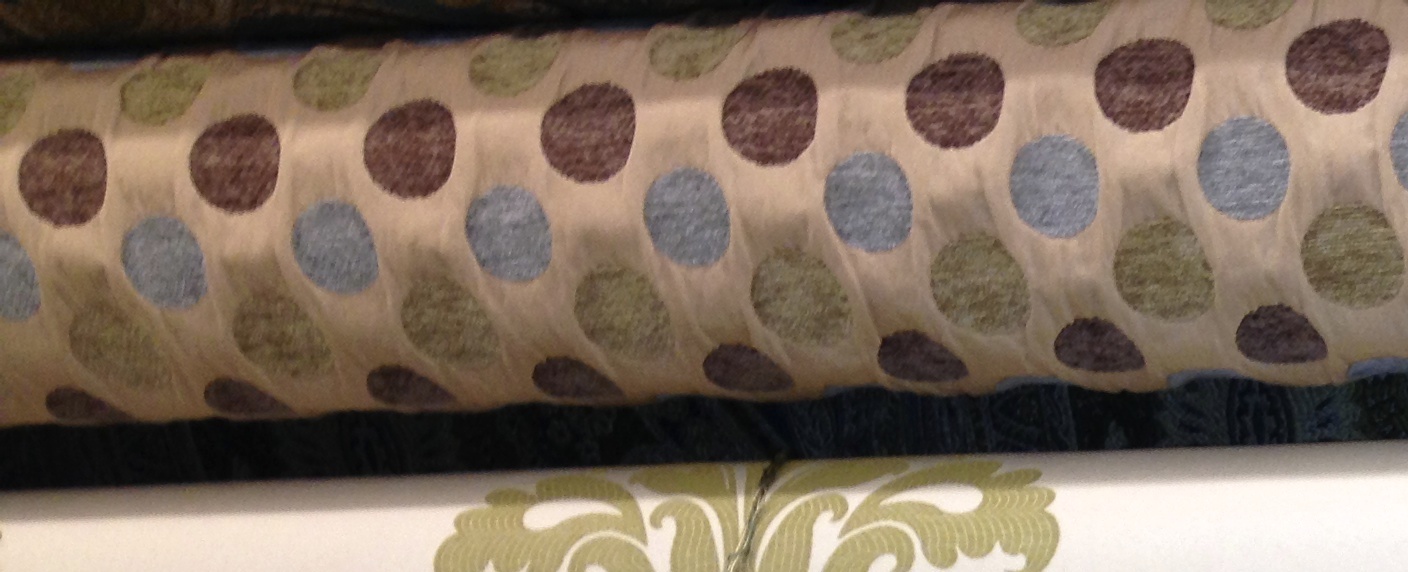
After a fabric search, 
Beth chose this upholstery weight polkadot I found at Hobby Lobby.
 (I love working at my Mom's.
I get to work in a carport instead of my dining room!)
After ripping off the old gimp, 
I cut and stapled the new fabric 
on the chair fronts and bottoms.
(I hope you are also noticing the beautiful background countryside of Greenwood, Va.!)
Beth had purchased this sweet toile on sale at Calico Corners,
so we decided to use this for the chair backs 
(you know how I like to mix things up!)
as well as some throw pillows for the sofa in an adjoining den.
 Fabric is on,
 now comes the trim...
Using the same fabric, 
I made double welting and added that to the backs and seats.
 Then I edged the back toile fabric in a beige gimp.  
I added chunky pewter nailheads (from u-Fab)
to corners and where the seams meet.
The new upholstery looks great with the wood trim. 
And for once, I didn't have to paint chairs!
 Lastly, this little desk chair...
..that had a cutout plywood bottom. 

This got a makeover, too:
I built, then upholstered the seat
in the same polkadot fabric, 
and added a gimp border.
I used a little Old English furniture oil on the scuffed wood...
Perfect!!!!
Beautiful detail on the wood.
I love these chairs!!!!!
Thanks, Beth!

Monday, April 22, 2013

Gilding Wax and Reinvented Small Treasures

When I first started using Annie Sloan Chalk Paint a few years ago, 
there was no stockist in my area, 
so I placed all my orders online 
with Patty Seaman of Classic Wall Finishes (bestfurniturepaint.com).
She has been so helpful with information 
on products and techniques over the years, 
and always give me such great feedback on my pieces.

Recently, she suggested I try this:
GILDING WAX! 
Oh, now this is gonna be fun!
And I've upgraded to these!!!!
These great chunky handled wax brushes and a brush buffer!
I have to admit, until now, 
I had only used little chip brushes or my dad's old shaving brush...
for applying wax....and rags to buff.
So here's my latest acquisition: 
A little apothecary style jewelry box.
Shall we get started??

 After painting the body and all the little drawers,

I applied my wax with my new brush.
Goes on like butter!!!!!!
I distressed and buffed.
 Now I'm going to give it just a hint of glitz
By applying a little of the gilding wax with my finger,
lightly along a couple of edges.
The piece looks amazing!
Here's a little decorative box with a place for a photo on top.
I epoxied a plaster owl right to the glass,
...and then I painted, glass and all, with chalkpaint.
I added some layers of dry brushing, and the gilding wax...
Dark wax brings out all the details.
And "antiques" everything.
This is fun stuff...
give it a try!!!!
(Oh, and yes, the items are for sale:
Jewely Box: $36
Owl box: $22)
sheilafox@aol.com

Saturday, April 13, 2013

Spring Project: Rebuilding a Home's Interior

I just got back from another Wake Forest, NC, weekend work trip
where Cristie and Andy live in this amazing farmhouse.  
(I've blogged about work here in the past...)
The house has been in Cristie's family for generations, 
and slowly but surely, she and Andy are turning this wonderful home into "theirs."
I'm not talking about losing the character of the home mind you....
just updating some of the not-so-wonderful home improvements made over the years.
Like this:  
WALLPAPER.
Lots and lots of wallpaper...
with flowers and birds...
in all of the bathrooms.

Now the wallpaper has been stripped!!
Paint colors have been selected and the painting is complete.
AFTER: Master bath and dressing area 
were painted in Sherwin Williams "Rainwashed."
 Now you can breathe!!!!!
So tranquil versus the floor to ceiling wallpaper.
Here's the front foyer when I arrived.
(Sorry for the crappy photo..)
...and  front hallway, which were painted in SW "Seasalt."

My assignment:
To "rebuild the home" with a fresh eye.
Create all the little vignettes 
that make a house a home.
This will be fun - there's so much to work with!!!


(This is all eye candy so I'm going to let the photos tell the story:)


Family photo wall.


 In the library, I reworked a few things as well...

And lastly...I wanted to address this dining room wall..
I took several small mirrors, 
painted a couple in different colors...

 and  rehung everything.
This  wall is so much more interesting now with the
various shapes and colors.
Work is done....time to play.
Outdoor time with Surge!
Thanks, Cristie (and Andy)
for another yummy project!