I'm doing my best.....
2017 was a busy and action packed year.
I look back on all the furniture makeovers and inventory that I have had and sold
(and have traveled through my house!)
and it completely blows my mind.
I'm a mini-factory!!!!!!!!
So here, at long last,
is another round of eclectic reupholstery projects I thought you might enjoy:
I'll show you how they started,
and how they looked after my makeover.
BEFORE:
Nasty old chair and ottoman.
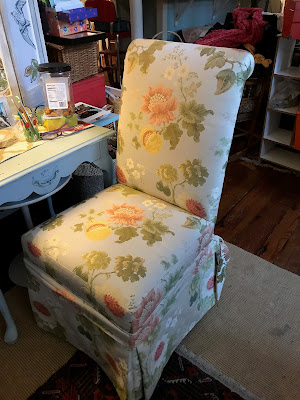
AFTER: Chair
After totally gutting and rebuilding,
I used old drapes and a duvet cover to reupholster.
I LOVE the curved front/back of this piece.
And the curve of the arms.
BEFORE: Ottoman
After a rebuild from the springs up,
I used a pillowcase topper on this one.
BEFORE: Trashed small table

AFTER: A petite upholstered bench.
I used a cotton rug remnant to reupholster.

Wilma has claimed it.

AFTER: Two ottomans
that I PROMISE you'll never see anywhere else.

BEFORE: Traditional Queen Anne chair

In progress: off with that nasty fabric and ready to paint.
AFTER:
I used a small rug to upholster the back.

BEFORE: Two victorian parlor chairs.
AFTER: I modernized these antiques by adding faux bois fabric.

BEFORE: Square coffee table.
AFTER: Yummy upholstered ottoman.

BEFORE: Pair of highback chairs.

AFTER: I love these...I went a little cookoo...
striped quilted ticking for seats...
matelasse for fronts..
...little bunny appliques...
...button trim

An pockets on the back!
BEFORE: Coffee table from alley.

AFTER: I reupholstered and used to stage
a window seat in a home.
Then it went to my booth.
After awhile,
I recovered and it sold immediately.
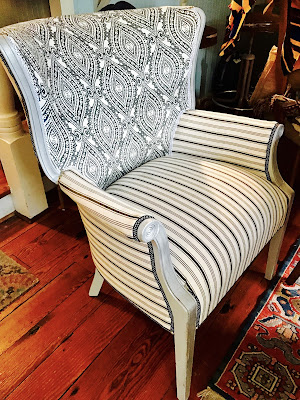
BEFORE: Traditional chair
AFTER: Funked up with graphite black and white.


BEFORE: Client wanted to fun up this parsons chair.
AFTER: I did.
BEFORE: Nasty old chaise
AFTER:
I went girly..

BEFORE: Another victorian chair
AFTER

BEFORE: Craigslist purchase
AFTER: Sweet and cottagey

BEFORE: Vintage slipper chair
AFTER: Reupholstered in vintage fabric scraps.


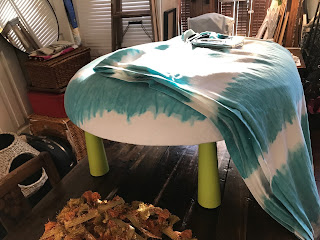
BEFORE: Thrift store Ikea plastic table.
In progress: I upholstered the top with some Target
cotton tie dyed style drapes...
AFTER: Then made a soft boxpleated ruffle
and added some funky tassle trim.
Another Wilma favorite.
BEFORE: Vintage gooseneck rocker.

AFTER: Fun and bright.
(Love the back!)
BEFORE: Pedestrian set of barstools

AFTER: Schumacher fabric samples make them
truly one-of-a-kind!
AFTER: Even basic wooden barstools can be dolled up.
Here I painted, gold tipped the legs,
and upholstered the wooden seats with
foam and this faux fur.
BEFORE: A deconstructed chair purchase...
AFTER: So lovely.
Here's the back.
I love the detail in the wood frame.
BEFORE: Thrift store find.
AFTER: Makes a perfect pair!
Here they are in my booth at
Greenwood Antiques,
and as of this writing, they are still available.
BEFORE: Another thrift store chair.
AFTER: So sweet now with two tones of
the same Robert Allen bird print.
Here's the back.
As of today,
still available for purchase at
The Lazy Daisy in Short Pump.
BEFORE: A pair of frenchy chairs.
AFTER: Another black and white treatment.
I love mixing fabrics! Can you tell?
Find me at
Relics to Rhinestones on Patterson.
BEFORE: Donated pair of barstools.
Damaged vinyl seats.
AFTER: I reupholstered the seats in vintage
feed sacks.
BEFORE: Single frenchy chair.

AFTER: Yummy graphic goodness
and sold in one day.

BEFORE:
My latest and final makeover is this ugly ass
chair.......

AFTER: That now rocks!
So deliciously yummy with the fuzzy pillow.


