Wednesday, November 2, 2011

I can't speak, but I can still PAINT! Tuscan Landscapes on Furniture


Jeepers, folks, I have been in bed for about a week now with some kind of nasty respiratory stuff....completely missed Halloween, my very FAVORITE occasion of the year, missed hosting my annual Halloween party....all of it went right down the tubes this year......

My front door


But even though this is day six with no voice,  I must be feeling a little better because last night I finally tackled this little tobacco stand that I bought at a thrift store some time ago...
Here's what it looked like when I purchased it:

Love these sweet little arms:


As you can see there were some serious veneer issues....


 I just peeled off the loose veneer, and added some wood fill here and then. When it was dry, I sanded and primed the piece which looked like this.  
And here it sat until last night....when I finally got my mojo back....

I started by painting most of the cabinet in a drybrush technique of Annie Sloan Chalk Paint in Aubusson Blue....but I just wasn't loving it.....so I decided to have a little fun and I painted a little tuscan landscape scene on the side panel...complete with lavender fields!


And then I painted another scene on the other side panel:


Heck, why stop now? 
Before I know it, I've painted the front with an open window scene....with a lattice window and flowers in a window box........and some very red fruit in a bowl inside on a table...and curtains blowing in the breeze...and a little scrolly iron light fixture. Geez, Louise, where is all this energy coming from all of a sudden?  Must be that prescription medicine kicking in that I got from the doc in a box today!


And then I painted the top in a mixture of Arles and Scandinavian Pink. A little distress sanding and waxing the piece, and here she is:


Tomorrow, she will be heading to my antique booth along with this polished up silver service:

Not bad for a sick day....
It's nice to be baaaack..........sort of.

Friday, August 26, 2011

A Buffet Makeover

Take a look at this incredible old buffet I purchased from a dealer recently.  It was in really bad shape, legs were just about broken off, lots of chewed and chipped wood....no back or shelves or door inserts....


 But it had such incredible detail and lines...I had to have it and ended up probably paying too much for the condition it was in...And then....I got to work!
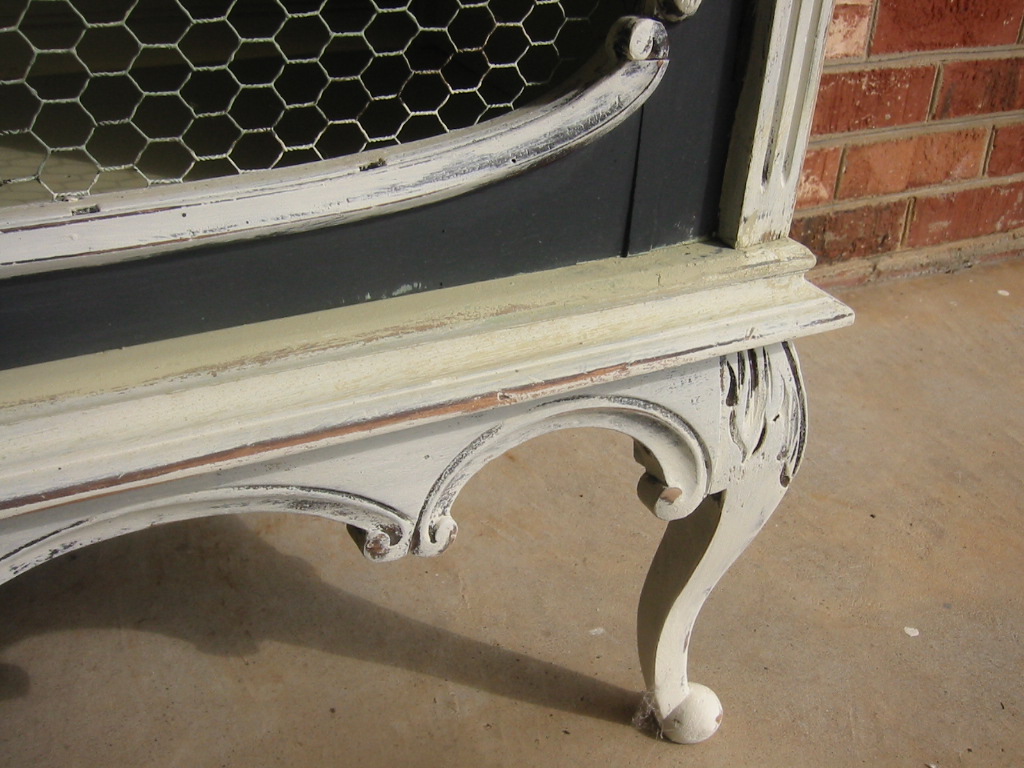
 Oh my, this is beautiful.  After reinforcing all the legs,I lined the back with a piece of beadboard I found in the alley.  It gives it the perfect vintage feel....I sanded down all the rough spots, used wood filler as needed. Then I painted using my favorite paint for furniture, Annie Sloan Chalk Paint.  The outside I painted in Graphite, the trim in Old White, and the interior in Versailles.
 Next i lined the door inserts with chicken wire which I simply cut and stapled to the inside of the door.
 On this top detail, I first painted with the Graphite, but then I went back in and dry brushed with Old White until all the carving pops.
 Then I added shelves for storage.  I painted them as well as the chicken wire in Versailles.
 Then I distress sanded and gave all of the wood a nice rubbing of wax.
 This one's a keeper.  I just can't let it go...........!!!!!!!!! Yet.........

Saturday, August 20, 2011

To Paint or Not To Paint (Those Ugly Wood Cabinets!!)


Why is it that some people have such an aversion to painting ugly wood cabinets? I don't understand it. If they're ugly, they're never going to suddenly be NOT UGLY.....unless of course you paint them!!!!!!  Listen carefully:  It is not a sin to paint ugly cabinets. You will not go to hell or pull all your hair out one day saying, "Oh my god, why did I PAINT my cabinets???" Just do it and enjoy a beautifully transformed space for years to come............Take a look at some of my past kitchen makeovers....

(Okay, I'll be honest....I don't have a before shot of this kitchen, but you can see a bit in the background...........bet you can't guess what time of year this was...) All the original cabinetry in this ranch home had been painted years ago in an off white.  Bronze appliances, and a really ugly faux dark wood formica countertop completed the totally dated look of this space.........Homeowners didn't want to invest a lot in this kitchen because the property will probably end up being sold as a "tear down."

Here's what the kitchen looks like after painting the cabinetry in a two tone treatment.  By painting the base colors a dark brown, it allows that ugly countertop to blend right in.......Stainless backsplash, appliances and vintage hardware give the space a great retro industrial feel.
 

 Next example:  A rental kitchen.  You've seen these stock oak cabinets.........Nothing fancy, solid, just not very attractive........Rather than replace them with new boring stock cabinets, why not............PAINT THEM???
 Here you go:  I painted the top cabinets in khaki, and the base, a navy blue. New hardware, and it looks right out of Pottery Barn. (The 2nd person who looked at this apartment rented it...Yay!)


 Here's a kitchen where the homeowner had glazed the top cabinets, but she wasn't happy with the look, and the tone didn't quite work with the tile backsplash.
 I did a two toned treatment: Navajo White for the top cabinets, Silver Sage for the base, and then added a distressed finish with sanding, stains, and a mauve glaze.  Now the upper cabinets blend in beautifully with the tile.

To look at this kitchen you might think the only solution is to gut it........

Well that just wasn't in the budget! I added a beadboard backsplash, and painted all the cabinetry in a sage green to integrate the countertop and added new hardware. Amazing. (Oh, I also got rid of the tape on that cabinet under the sink!)

This next one might get the truly ugly award........This kitchen probably hadn't been touched since the 40's/50's.  Plywood cabinets with a horrible dark wood stain.


Paint is your friend!!!!!!!!! Incredible transformation just by painting and adding some inexpensive new hardware. 
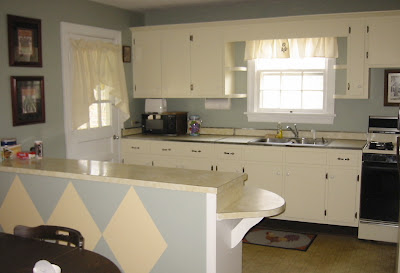
 

 Another dated dark kitchen with pine cabinetry......

Totally improved and opened up with paint.  Next up, stripping the wallpaper......


Here's a little kitchen area at a client's riverhouse.....


...that has been totally freshened up with some beadboard and paint.....even the nasty exhaust hood was painted.

Dark kitchen...........................


Bright kitchen!!!!!!!!!!!


 This client wanted to reduce all the wood in the kitchen but didn't want to deal with having to paint all the moulding throughout the house......


 So I painted only the base cabinets.......A new backsplash and countertop unifies the wood tones that were kept on top and in the trim.


This kitchen wasn't bad but opened up to a great room, and the homeowner wanted more warmth...


So I gave the cabinets a tuscan treatment by layering paint/stains/glazes/distressing, and new hardware, wood countertops and tile backsplash make the space feel like a room now and not just a kitchen.


 This is actually my own kitchen and the first time I painted cabinets.........Yep, there are those ugly honey oak cabinets................
Painted cabinets, beadboard backsplash, wood countertops and open shelving.
'

I call this my George Costanza transformation because it's the opposite of what I normally do.  These homeowners wanted to get rid of the formica white cabinets, and have an old world rustic kitchen.


Their son did all the tile work, and I painted all the cabinetry in a faux treatment to make them look like rich cherry. Each door is a piece of art...........I still think this is one of my all time favorite makeovers!


This kitchen was renovated in the 70's.  Again, the cabinets were in great shape, just ugly. Honey oak with brass hardware....

I painted everything.  Look how beautiful and clean this space is now. They absolutely LOVE their kitchen, and they hesitated on painting those cabinets for YEARS.
I rest my case.

Thursday, August 18, 2011

Just Another Day in the Life of a Transformation Artist.......

Early this morning, after my walk and taking care of my friend, Julie's, cats, I had a hankering for some trash to treasure transformations......I can't help it, guys, it's an addiction;)
I already had one project to work on today, this pair of ugly chunky chairs I found in the alley....

...but i yearned for more exciting projects to sink my teeth into.........so I headed on over to Fantastic Thrift just as they opened their doors at 10AM.......I found......a couple of great quilts, a chest of drawers, and another (sigh) end table.........I headed home with the back of the car open, table legs hanging out.  Call me Jed Clampett, I don't mind...

 I spent all day out on the sidewalk assembly line.  There's just something about the instant gratification of furniture transformation that makes me happy.  I guess because I can see those tangible results by the end of the day.....Makes me feel like I DID something.


First off, I tackled the chairs..........I reinforced the seats, then used a cabinet door I purchased from the Habitat for Humanity Restore to become the "bench" seat.....I have a friend who has been looking for a white bench for her front porch, so I primed and used exterior white house paint on the bench.  It's  already packed up in the car ready to go to Charlottesville.


This is such a great idea for junk chairs........It's actually much more fun when you find a couple that don't match exactly, but have similar seat heights........
Here's one I did a few months ago that I hated to let go of...  It now lives at Tara's house;) 


I purchased this little chest of drawers for $7.  Everyone needs storage, right? So I figured this will get a little paint, and then go in my booth.


 Here it is after two coats of Annie Sloan's "Old White" chalk paint..........It's fine, but...well, not very interesting..........hmmm...

I love putting numbers on drawers, but this time I decided to go european! I stenciled "un, deux, trois, quatre" in blue and then dry brushed red on the knobs and edges.  After everything was dry, I waxed it.  I'll buff it in the morning before it goes to the booth.  Can't you just see this in a little girl or boy's room?  Oui, oui!

 Next up, this end table.
Love how the legs turn out.........Two tiers are great for storage, too....

So I painted this one in ASCP Old White and Versailles.........
Next, the fun part........Distressing, and waxing.  First I gave it a nice sanding all along the edges, and then I waxed.  I used regular Johnson's paste wax, and also Annie Sloan's dark wax.......I like to apply with a little chip brush, and then i rub down with an old cloth until it looks just right.
 Look at these scrumptious chippy legs now;)

 Next project, yup, two more chairs I snagged at Diversity Thrift...The cane is torn in both, but, well, you know what I'm gonna do with them.......a bench!!!!! I love that they are two different styles
 I started by painting one in a Annie Sloan Chalk Paint color I'd never used before: a red called "Emperor's Silk." It looks a little funky now, but just wait til I put that dark wax all over it and sand it. I bet it's going to have an incredible patina. I'm excited to finish, but too pooped to continue today, so  it will just have to wait for another day.........


Cleo Riley has the right idea.  She jumped into my new quilt just as it was coming out of the warm dryer........and she hasn't moved all day.
Who would have guessed she was an April Cornell gal?