Wednesday, August 26, 2015

Joanne's Kitchen - Phase Two

Earlier this year,
my friend/client, Joanne, purchased a new home.
 Her kitchen looked like this when she moved in.
 And I helped her spruce it up.
I painted the walls in Benjamin Moore
"Barren Plain."
 And I painted the bottom cabinets in BM Brewster Gray.
The colors worked much better with the floor tile,
and at that point, Joanne wanted to keep the upper
cabinets unpainted.
 But after a few months, 
she has reconsidered!
So while she was out of town this past weekend,
I got to work.
 After cleaning down all upper cabinets, 
I primed with this product.
It is an excellent bonding primer.
 Primed..
 And then I painted the cabinets 
in Benjamin Moore "White Dove."
 It took lots of coats, 
but it's finally getting there!
 Oh yes, it's amazing the difference this makes!
I also painted all the molding.
 I made relaxed roman shades and hung in the kitchen window...
Love this fabric that came from Ufab.
 
I also made one for the back door.
 The kitchen looks so much cleaner now, because it's not chopped up 
with those flesh-toned upper cabinets.
 And I love the way all of Joanne's blue and white knick-knacks
look up against the white.
Next phase will be a backsplash…
But for now, it looks great.
 
Before….
And after.
Welcome home, Jo!!


Have a kitchen that needs a makeover?
SheShe, The Home Magician
Sheila Fox
sheilafox@aol.com
804-402-4370

Monday, August 24, 2015

A Revisit: Sprucing up the Garage Entrance


Years ago, 
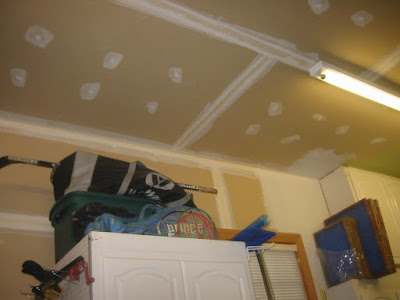
I worked on this unfinished garage.
The homeowners had outfitted it with their old kitchen cabinets.
But the walls/floor/ceiling were all unfinished.
They used their old kitchen sink/cabinet for the utility sink.
Yep, I think this could use a little pizazz!
What a great idea though! 
Recycling your old cabinets for extra storage,
instead of tossing them!
 The back steps to the kitchen were unpainted wood.
 And the floors were ugly concrete.

Ready for the SheShe "AFTER?"

Wow!!!!!!
This is awesome!
I painted all the walls in Benjamin Moore "Dill Pickle."
I used peel and stick tile to cover this area.
I purchased two inexpensive runners.
One for the floor.
The other I cut in half and used for the back steps.
I painted the steps in White Dove and Dill Pickle.
The railing in White Dove.
On the back wall, next to the door,
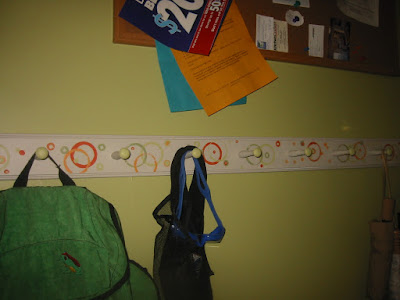
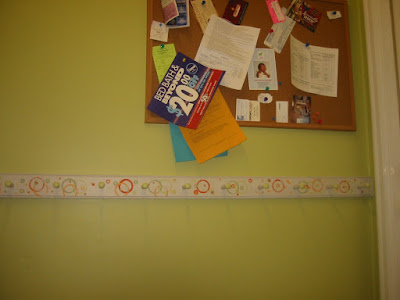
I painted and hung this peg rack.
 Using lid tops and some other found objects, 
I had the children stamp on designs in oranges and greens.
Now they have some ownership in this makeover!
Perfect place for their backpacks and jackets.
Right outside the door, I hung this cork board.
Over to the sink area….
Heck, this looks like a kitchenette now! 
I used the same peel and stick tile
to create a backsplash.
Hung some towels, etc.
Heck, I could live in this garage!

Have a room that needs a little spruce up?
I'm your gal!
SheShe, The Home Magician
Sheila Fox
sheilafox@aol.com
804-402-4370


Sunday, August 23, 2015

Instant Curbside Appeal: Paint Your Front Door!

One of the easiest things you can do to freshen up your home's
curbside appeal is to paint the front door.
Add a little color!
 This cute little house is my friend/client, Joanne's.
 She was ready to add a little zest..
Paint the door!!!!!
 So I supplied her with several samples, 
and here's the one she chose.
 Isn't it wonderful?
 It's actually the color I am getting ready to paint my entire house.
So you know I love it!!!!
It's Porter Paint "Aqua Bay."
 And remember her kitchen I blogged about sometime ago?
It looked like this when she moved in.
I painted the walls and base cabinets earlier this year.
Well, I'm happy to report, that while she's away this weekend,
 I'm busy doing a few more things in the kitchen.
Hoping to finish it up on Tuesday,
and you'll be the first to see!!!!

What a lovely weekend!!!!!!!!!
Hope you were out in it enjoying yourselves.
Cuz I was in this kitchen!!!!!!

Saturday, August 15, 2015

Reinventing Basic Office Chairs


My friend, Patty, offered me this pair of
cane office chairs her organization was getting rid of...
 …mainly because one of the chairs had a broken seat…...
Not a problem for me!
I worked on the broken chair first.
I painted the frame in Annie Sloan Chalk Paint in Paris Grey.
 
Then I painted the inside cane in Country Grey.
 One painted, one not.
 Hmm, I toyed with the idea of making a set like this,
matching fabric in different palette.
Wilma certainly was partial to the idea.
But then I decided, probably not.
I cut a piece of plywood to fit inside the chair 
with the broken seat.

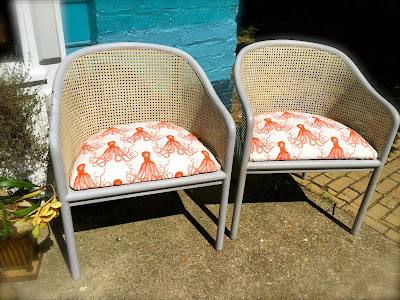
Then I added foam and batting and upholstered it in this octopi print. 
I love orange and grey of late!
I attached the seat with this angle bracket underneath.
And then I cut out little pieces of MDF and drilled holes,
and then screwed through the cane into the seat.
Here it is all waxed and buffed.
One down!
 Would be perfect with a little back pillow...
 So today, 
I worked on the second one.
 I reupholstered the seat and attached it just like before.
And now I have this cute little pair.
 Boring office chairs be gone!
 Now they are a perky petite pair of F U N!
The pair is for sale for $195.
I'll be packing them up to go to Greenwood Antiques tomorrow,
so if you're interested, let me know ASAP!
Thank you!!!!!!

SheShe, The Home Magician
Sheila Fox
sheilafox@aol.com
804-402-4370